Introduction
One of the most powerful features in QuickFile is Bank Tagging. Bank Tagging allows you to setup a feed with your bank or upload your statement and create all your sales invoices and expenses from your bank transactions. It’s a very intuitive system that allows you to churn through large periods of bookkeeping in no time at all and with minimal experience.
This brief guide will show you how to get started with the Bank Tagging features and is particularly suited for those new to QuickFile.
Step 1. Upload your statement
If you would like to create historical accounting records you can upload a bank statment. In order to do this you will need to have online banking setup with your business bank account provider. Most online banking systems allow you to download your data into a CSV file (the CSV is essentially just a basic spreadsheet). This file can then be imported into QuickFile. We support most major banks and have simplified the import process so in many cases all you need to do is select your issuing bank. If your bank is not on the list then you can select “Other” and QuickFile will allow you to manually instruct where the columns for the relevant information are in the spreadsheet.
You can read more on importing bank statements here.
Once imported all the new entries will have a button “Tag Me”. Your objective is to work through this list and tag all the items.
Step 2. Tagging a single item
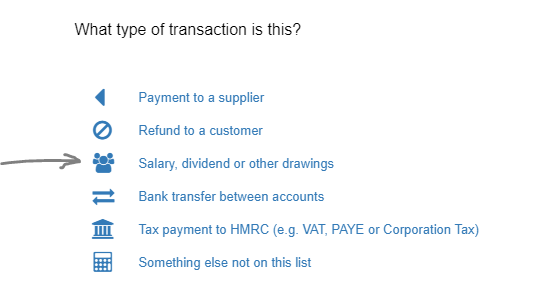
Let’s start with the given amount of money coming into the business from a client. Click the “Tag Me” button and select the option “Payment from a customer”. You can now select “Create a new invoice for this receipt”. Enter a client name and on the proceeding screen you will be able to key-in a description, select a category (more help on purchase categories here) and declare (if applicable) any VAT.

The same method works for any purchases you make. This time you click to tag the “Money Out” entry and select the option “Payment to a supplier”. Enter the supplier’s name and provide a purchase description, along with (if applicable) any VAT applied.
In each case when you tag a sale or a purchase QuickFile builds an invoice behind the scenes and pays the invoice using the credit (for clients) or debit (for suppliers) on the bank. You can see these invoices once you have tagged the bank entry by clicking on the new green button “Tagged”. A link will now appear to the invoice that has been created.
Step 3: Tagging salaries, drawings and tax payments
You will notice that when you tag a new item there’s also an option to tag salaries, dividends and drawings, along with options for tax payments.
These wizards will make the necessary postings on your nominal ledgers to report each event. If you want to read more about these options in detail you will find a couple of links below.
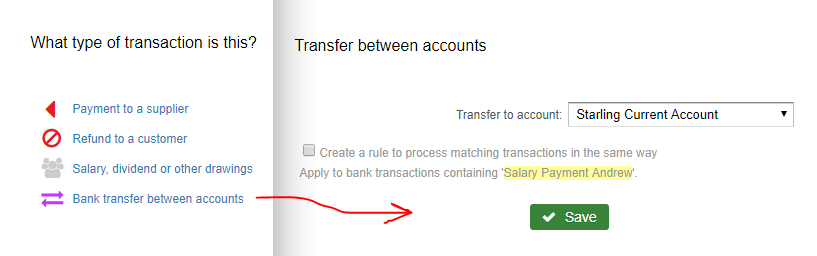
Step 4: Tagging bank transfers
Handling bank transfers in QuickFile is simple. When you tag a transaction on your bank you will see an option “Bank transfer between accounts”. You will then be able to select the other corresponding bank account from a drop-down list. To avoid duplication QuickFile will look for a matching entry on the same date and link it up, if no matching entry is found a new one will be created.
Any loans a business holds (either money loaned to the business or by the business) can be tracked in a separate bank account and payments in and out recorded as bank transfers. Credit card balances are also tracked in separate bank accounts so paying down a credit card is simply recorded as a bank transfer to the credit card account.
Step 5: Tagging 2
OK, now that you are familiar with the basic tagging options it’s time to speed things up! In addition to the single tagging options you can also tag items in bulk. If you have a routine payment or deposit on your account you can first perform a search for similar items:

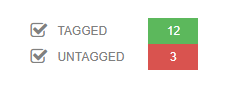
By clicking the magnifying glass icon next to the transaction reference a search is performed for transactions that share a similar name. Initially you will see how many matching tagged and untagged items were found. If you click on the untagged items, the statement view will drill-down on these items. You can then select all entries using the checkbox in the top left corner and click the button “Bulk Tag Selected”.
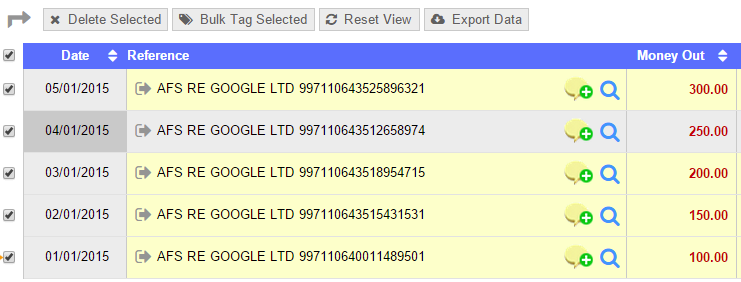
The “Bulk Tag Selected” is similar to the single “Tag me” option with a few exclusions (tax payments, salary and drawings). You can use this tool to create up to 50 sales invoices, purchases, bank transfers, and miscellaneous postings at a time. Most businesses have routine transactions for payments and receipts so bulk tagging is an excellent way to complete large chunks of bookkeeping in a minimal amount of time.
Keep an eye on the tag count in the top right for an overview of how many items remain untagged.
Step 6: Miscellaneous postings
The last option on the tagging dialogue pop-up “Something else not on this list” can be used as a sort of catch-all for those things that don’t quite fit into the other categories. Essentially, it allows you to post the entry from the bank, directly to a nominal account. There are only seldom cases when this option should be used and it’s advisable not to use this option as a shortcut for recording general purchases or sales. You can however use this option for items that go in to and straight back out of the account, i.e. returned cheques or cancelled direct debits.
The Suspense Account
The suspense account is a nominal account (number 9998) that holds any unexplained balances in your business. When you upload a new bank statement, all the items will be marked in red as untagged. The total balance of these items will reside on the suspense account and will slowly be reduced as you tag each item. You can see this in action by uploading your bank statement and referring to the Chart of Accounts (“Reports” menu). The general aim is to keep your Suspense Account as close to zero as possible, this indicates that all your transactions have been fully explained.
Auto-Tagging and Tagging Rules
When you get more confident with bank tagging you can set up rules so that whenever certain transactions are imported they are automatically processed and tagged without you needing to do a thing.
You can find out more about Auto-Tagging and Bank Tagging Rules here. We also support a range of bank feeds through Open Banking, streamlining your bookkeeping process!