When you create a sales invoice in QuickFile you will notice a small cog icon adjacent to the description field on each of your invoice lines. If you click this icon a number of additional options will appear below.

Here is a brief overview of what each option does:
Category
The category allows you to allocate a particular invoice line to a specific nominal ledger account. The default setting here is “General Sales (4000)”. You can see a full list of your sales nominal ledger accounts in the Chart of Accounts report, from here you can also create your own custom sales codes for more granular reporting. You may for example want to separately report your shop sales from your mail order sales, for this you just need to create two sales nominal ledger accounts and then select the appropriate account when you draft your invoice.
Insert page break
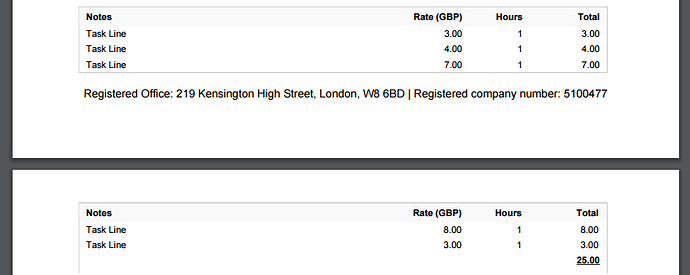
If you check this box a page break will be inserted right after the line. These page breaks are only applied to the PDF version of your invoice and allows you to more accurately split pages on your invoices and estimates.

Insert sub-total
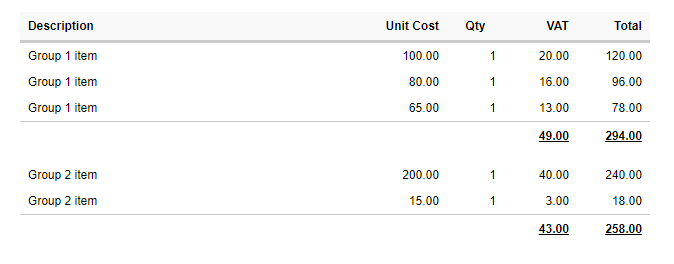
If you check this box a sub-total line will be appended to the line below summing up all the items above or since the last sub-total was inserted. This offers a convenient way to group together items on your invoice, for example if you want to separate out your parts and labour costs on an estimate or invoice.

Convert to comment line
QuickFile support “comment lines”, these are used in cases where you simply want to add some narrative within your itemised section. Maybe to explain the preceding items, I.e. “The above items will be delivered as soon as stock levels are replenished”. You can use comment lines for all sorts of things, they’re just a flexible way to intersperse text within your invoices and estimates.