Introduction
Projects offer a simple way to group together your sales, expenses, estimates and purchase orders into a single container. This makes it easier to report on a specific activity within your business for example a project you’re working on for a client or perhaps a new division in your sales team.
We’ve designed the project system to be as flexible as possible by relying on what we call project tags. Essentially you can apply tags to any of your sales invoices and purchase invoices as soon as they have been created. All items with the same tag will be grouped together and you will be able to quickly see all sales, expenditure on an invoice and cash basis.
Adding a project tag
All you need to do to create your first project is to add a tag. You can add up to 5 tags to any item, tags can be applied to any of the following:
- Sales invoices
- Purchase invoices
- Estimates
- Recurring invoices
- Purchase orders
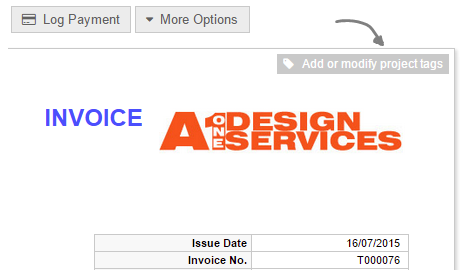
When previewing any of the above items hover your mouse over the top right hand corner and you will see a grey button ‘Add or modify project tags’.
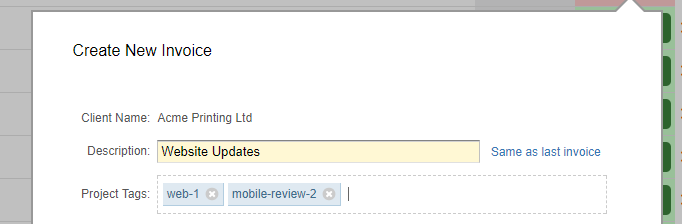
When you click this a dialogue box will appear where you can start entering your tags. The tags must be alpha-numeric and any spaces will be substituted for hyphens.

When you start typing the name of a tag any existing ones will automatically appear making it easy to link items to project tags that you have already created.

Once you have entered your tags you can save them and they will now appear as markers along the right hand edge of the document.

You can remove any of these tags by hovering your mouse over them and then clicking the delete icon.

You can also jump right into the project report by clicking on the tags corresponding view icon.

Project Reports
As soon as you tag an item it instantly becomes recognised as a project and you can then view detailed analytics on all items linked to the same tag.
You can see a list of projects in the project management area. This will give you a quick summary of all income and expenditure on an invoice and cash basis. You can order your project tags based on any of these metrics.
The project report detail screen looks something like below:

Project totals
The table at the top of the screen reveals a breakdown of all issued sales and purchase invoices (on the top line). This will give you a projected figure for the net amount of the two assuming they are all fully paid. We refer to this as the projected profitability.
On the line below you will see the cash position, this is all monies received and paid in relation to all tagged invoices. The amount received less the amount paid is the cash profitability.
Project adjustments
The project incoming and outgoing totals are typically derived from sales invoices (to clients) and purchase invoices (from suppliers). There may be occasions when you want to introduce funds into the project or make deductions that aren’t linked to a specific invoice, e.g. payroll costs or apportioned invoices (i.e. where only a part of it is attributable to the project).
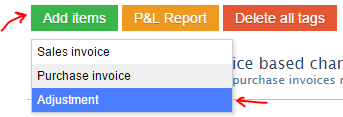
From any project detail screen you can easily make a generic adjustment to the invoice and/or cash based values. To add a new adjustment click on the green button “Add items” and select “Adjustment”.
You can then set a date, description and amount to adjust the project totals by.

You will notice there are two boxes once for invoice total, one for cash total. You can adjust either independently or both together. Invoicing totals are projected income/expenditure for a given project, cash totals are for actual funds paid/received.
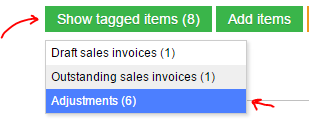
You can easily view or edit any of your prior adjustments by going into the “Show tagged items” menu and selecting “Adjustments”.

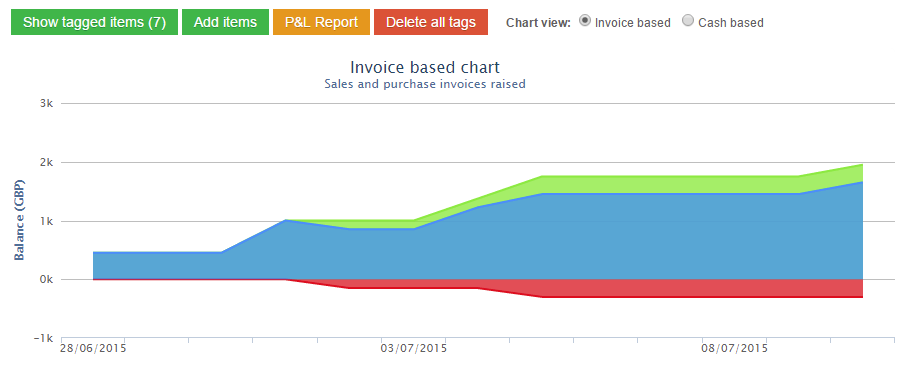
Project activity chart
The line/area chart below the totals shows the chronological changes for income and expenditure. The red area hangs below the x-axis to track any purchases, the green area sits above the x-axis to track sales. There is also a blue line that floats between the two to mark out the profitability. You can switch the chart between an invoice based view and a cash based view.
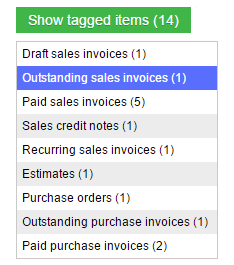
Drilling down on tagged items
From the project report screen you can easily drill-down on any tagged items by clicking the green button ‘Show tagged items’.
Tagging recurring invoices
Any tags that have been applied to a recurring invoice template will be automatically copied over to any invoice automatically created from that template. Similarly any estimate will transfer it’s tags when converted to an invoice.
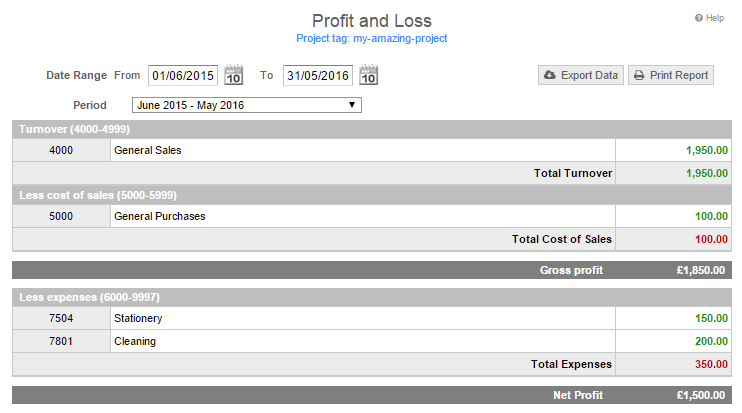
Project level profit and loss report
To view a project level profit and loss report click the orange button within the main reporting screen. A project level P&L will show all nominal activity for all tagged sales and purchase invoices within a given project. This will allow you to quickly see how these invoices are categorised.
Locate untagged sales and purchase invoices
On your main list of sales and purchase invoices you will find a filter within the advanced search box so that you can easily isolate all invoices that do not have a project tag.

This is a useful filter when you want to ensure that all your income and expenditure has been grouped to a specific project. You can also use this filter to show all tagged items, the default will be “All”.
Applying project tags from the bank
In 2018 we updated the bank tagging dialogue boxes to enable project tags to be applied when a backing invoice is created from a bank transaction. You will now see an additional box to input your project tags.